Recovering Censored Text Using Photoshop and JavaScript

My friend Andrew recently posted a teaser for a new project he’s working on, but with part of the headline pixelated to obscure what the project actually is. My curiosity got the best of me and I decided to do what any self-respecting geek would do: write a program to figure out what the censored text said.

Ultimately I failed to recover most of the censored text (except “to”), so I had to cheat a little. The following video is the program running on a very similar image I created. This proves it works in ideal conditions, but needs some improvement to work in less than ideal cases.

(and no, as far as I know my friend’s project has nothing to do with eating monkeys)

Applying a filter like Photoshop’s “mosaic” filter obscures the original data, but doesn’t remove it entirely. If we can reconstruct an image with *known* text that looks very similar to original image, then we can be pretty sure the original text is the same as our known text. This is very similar in principle to brute-force cracking a password hash. For a more detailed explanation see this article.

Photoshop was an obvious choice since I needed to recreate the exact same fancy styling as the original image, then apply the exact same mosaic filter. I figured I would have to write a script that tells Photoshop to generate images, then use an external tool to actually compare them to the original.

It turns out that Photoshop CS3 has all the features necessary to pull the whole thing off without any other programs or tools. The most important feature is the JavaScript scripting environment built into Photoshop, which is far more powerful than the AppleScript environment (and a *much* nicer language, in my opinion).

CS3 added two other features that are critical to this task: Smart Filters, and Measurements. Smart Filters lets you edit a layer (namely the text with effects applied) *after* you apply a filter that would have previously require rasterization. This lets us apply the censoring filter to our styled text, and later change the text without having to manually reapply the filter. The “measurements” feature lets you record various statistics about an image or portion of an image: in our case we’ll want the “average gray value” of the “difference” between the original and generated images.

picture-10.png

First we need to prepare the environment. Open the original image in Photoshop, and attempt to replicate the original un-censored text as closely as possible (you need *some* uncensored text as a reference). Place your text layer on top of the original and toggle between normal and “difference” blending modes to see how you close you are. Ideally everything will be black in “difference” mode. It’s very important to precisely match the font, size, spacing, color, effects like drop shadows or outlines, and even the background. If these are off even by a little bit it will throw things off. I ended up having to cheat because I couldn’t match the slick styling of the original text with my lame Photoshop design skills.

Once the text matches and is lined up perfectly, select the layer then choose “Convert for Smart Filters” from the “Filter” menu. Now select the censored portion of the text and apply the same filter used on the original image, again matching it as closely as possible. For the mosaic filter, you can line up the “grid” by adjusting the origin and size of the selection (yeah, it’s a pain).

picture-11.png

Finally, make sure your layer is on top of the original, and the blending mode on your layer is set to “difference”. Double-click the Smart Object layer to open it’s source document, and adjust the variables listed at the top of the JavaScript to match the names and layers. Also, in the menu “Analysis”: “Select Data Points”: “Custom…” make sure only “Gray Value (Mean)” is checked.

Code

Rather than attempting to explain it in detail here, just read the code and comments. Here’s a quick summary:

  1. Start with the first character. Try setting it to each of the possibilities (a through z, and a space), and record the difference score between the original image and generated image. Only look at the first half of the current character (since the second half will be influenced by the *next* character).
  2. Sort the results. Lower scores are better (less different)
  3. Now try each of the top 3 characters along with every possibility for the *next* character. This time record score for the whole width of the current character since we’re checking the next character as well.
  4. Pick the best choice, either the best permutation out of all 81 combinations (3 best * 27 possible), or out of the 3 averages for each best.
  5. Repeat for the next character until done.
// change these parameters based on document names and layer ordering
baseDocName = "base.psd";
baseDocTextLayer = 0;
textDocName = "The easy way to do somethingss12.psb";
textDocTextLayer = 0;

knownString = "The easy way "; // the part of the string that’s already known
missingLength = 20; // number of characters to figure out

method = 3;
debug = false;

function main()
{
    baseDoc = documents[baseDocName];
    textDoc = documents[textDocName];

    // get the top left corner of the text layer in the main doc
    var mainBounds = baseDoc.artLayers[baseDocTextLayer].bounds,
        mainX = mainBounds[0].as("px"),
        mainY = mainBounds[1].as("px");
    
    // possible characters include space and lowercase.
    var possibleCharacters = [" "];
    for (var i = 0; i < 26; i++)
    {
        possibleCharacters.push(String.fromCharCode("a".charCodeAt(0) + i));
        //possibleCharacters.push(String.fromCharCode("A".charCodeAt(0) + i)); // uncomment for uppercase letters
    }

    var fudgeFactor = 3,    // number of top choices to try
        guess = "";         // guessed letters so far

    for (var charNum = 0; charNum < missingLength; charNum++)
    {
        results = [];
    
        // get the beginning and potential end (width of a "M") of the next character
        var w1 = getStringBounds(knownString + guess),
            w2 = getStringBounds(knownString + guess + "M");

        // PASS 1: half the potential width, since we’re not looking at the next character yet

        // half the width of "M"
        setSelection(mainX, mainY, (w1[2].as("px") + w2[2].as("px")) / 2, 15);//w2[3].as("px"));
    
        // get the score for every letter
        for (var i = 0; i < possibleCharacters.length; i++)
        {
            var val = getStringScore(knownString + guess + possibleCharacters[i])
        
            var res = { ch: possibleCharacters[i], v: val };
            results.push(res);
        }

        // sort from best (lowest) to worst score
        results = results.sort(function (a,b) { return a.v – b.v; });
        
        // method 1: too simple, poor results
        if (method == 1)
        {
            guess += results[0].ch;
        }
        else
        {
            // PASS 2: full (potential) width of the current character, testing each of the few top matches and every possible next character
            
            // full width of "M"
            setSelection(mainX, mainY, w2[2].as("px"), 15);//w2[3].as("px"));
        
            var minValue = Number.MAX_VALUE,
                minChar = null,
                minSum = Number.MAX_VALUE,
                minSumChar = null;
            
            // try the few best from the first pass
            for (var i = 0; i < fudgeFactor; i++)
            {
                var sum = 0;
                for (var j = 0; j < possibleCharacters.length; j++)
                {
                    // get the score for the potential best PLUS each possible next character
                    var val = getStringScore(knownString + guess + results[i].ch + possibleCharacters[j])
                
                    sum += val;
                    
                    if (val < minValue)
                    {
                        minValue = val;
                        minChar = results[i].ch;
                    }
                }    
                if (sum < minSum)
                {
                    minSum = sum;
                    minSumChar = results[i].ch;
                }
            }
        
            // if the results aren’t consistent let us know
            if (debug && results[0].ch != minSumChar || minChar != minSumChar)
                alert(minChar + "," + minSumChar + " (" +results[0].ch + "," + results[1].ch+ "," + results[2].ch+ ")");
            
            if (method == 2)
            {
                // method 2: best of all permutations
                guess += minChar;
            }
            else
            {
                // method 3: best average
                guess += minSumChar;
            }
        }
        WaitForRedraw();
    }
}

// measure the gray value mean in the current selection
function getMeasurement()
{
    // delete existing measurements
    app.measurementLog.deleteMeasurements();
    
    // record new measurement
    app.activeDocument = baseDoc;
    app.activeDocument.recordMeasurements();//MeasurementSource.MEASURESELECTION, ["GrayValueMean"]);
    
    // export measurements to a file
    var f = new File ("/tmp/crack-tmp-file.txt");
    app.measurementLog.exportMeasurements(f);//, MeasurementRange.ACTIVEMEASUREMENTS, ["GrayValueMean"]);
    
    // open the file, read, and parse
    f.open();
    var line = f.read();
    var matches = line.match(/[0-9]+(\.[0-9]+)?/);
    if (matches)
    {
        var val = parseFloat(matches[0]);
        return val;
    }
    return null;
}

// sets the value of the test string
function setString(string)
{
    app.activeDocument = textDoc;
    app.activeDocument.artLayers[textDocTextLayer].textItem.contents = string;

    WaitForRedraw();
}

// gets the difference between the original and test strings in the currently selected area
function getStringScore(string)
{
    setString(string);
    
    // save document to propagate changes parent of smart object
    app.activeDocument = textDoc;
    app.activeDocument.save();
    
    // return the average gray value
    return getMeasurement();
}

// get the bounds of the text
function getStringBounds(string)
{
    app.activeDocument = textDoc;
    // set the string of the text document
    setString(string);
    // select top left pixel. change this if it’s not empty
    app.activeDocument.selection.select([[0,0], [0,1], [1,1], [1,0]]);
    // select similar pixels (i.e. everything that’s not text)
    app.activeDocument.selection.similar(1, false);
    // invert selection to get just the text
    app.activeDocument.selection.invert();
    // return the bounds of the resulting selection
    return app.activeDocument.selection.bounds;
}

// sets the base document’s selection to the given rectange
function setSelection(x, y, w, h)
{
    app.activeDocument = baseDoc;
    app.activeDocument.selection.select([[x,y], [x,y+h], [x+w,y+h], [x+w,y]]);
}

// pauses for Photoshop to redraw. taken from reference docs.
function WaitForRedraw()
{
    // return; // uncomment for slight speed boost
    var eventWait = charIDToTypeID("Wait")
    var enumRedrawComplete = charIDToTypeID("RdCm")
    var typeState = charIDToTypeID("Stte")
    var keyState = charIDToTypeID("Stte")
    var desc = new ActionDescriptor()
    desc.putEnumerated(keyState, typeState, enumRedrawComplete)
    executeAction(eventWait, desc, DialogModes.NO)
}

main();

The raw code and sample Photoshop file are available on GitHub.

Issues

This problem is particularly tricky for proportional fonts, since if you get any character wrong and it’s width is different than the actual character, then all subsequent characters will be misaligned, causing more incorrect guesses, compounding the problem even more, and so on. I’m not sure how to deal with this, other than improving the overall matching quality. Ideally we would test every possible combination for the entire string, but that would require 27^n tests, where n is the number of unknown characters. This is obviously not feasible.

With the simplistic method of iterating over each position and trying each possible character, it turned out that almost every single “guess” was for the letters “m” or “w”. This was because for positions where the original was narrower characters, the “m” would “bleed” over into the *next* position, improving the score regardless of how well it actually matched the current character. To get around this, we only look at the difference for the first *half* of the character’s position.

Since looking at the first half of the character removes some valuable information, we then do a second pass using the top several guesses from the first pass, this time looking at the full width of the current character along with each of the possible next characters (27 tests + 3 runs times 27 tests results in 108 tests per character).

Further improvements could definitely be made, but I’ve already spent several hours too many on this.

The current algorithm runs at about 3 characters per minute. The overhead of Photoshop saving the Smart Object document on every individual test case is significant. If this were a special purpose program manipulating images directly it would likely be much faster. The tradeoff, of course, is you have all of Photoshop’s flexibility at your disposal for matching the original document’s font, size, style, spacing, and censoring effects, which is very important. For small amounts of text speed isn’t a problem.

Conclusion

While my original goal of recovering the censored text on my friend’s page was never achieved, the project was a success. It works well on my test image, and I learned about 3 obscure but cool and useful features of Photoshop!

Oh, and *that’s* why ██████████ uses black ink to ██████ their ██████!

Skype outage

Users of the popular VoIP network, Skype, have been experiencing widespread outages for more than a day now. And of course thanks to Murphy’s Law I happened to pick today to try to get my family set up on Skype.

So far I’ve heard three theories as to what is going on.

– Skype says the problem is [a deficiency in an algorithm within Skype networking software](http://heartbeat.skype.com/2007/08/the_latest_on_the_skype_signon.html), whatever that means. After reading a little about the [great lengths Skype goes to](http://www1.cs.columbia.edu/~salman/skype/) in order to obfuscate their network protocol and prevent reverse engineering, it wouldn’t surprise me if they spent more time protecting the protocol than making sure it works well…

– A [Microsoft update caused the outage](http://blog.tmcnet.com/blog/tom-keating/skype-outage.asp).

– A [remote DoS exploit](http://en.securitylab.ru/poc/301420.php) that was published on securitylab.ru was responsible:

#!/usr/bin/perl
# Simle Code by Maranax Porex ;D
# Ya Skaypeg!!

for ($i=256; $i>xCCCCC; $i=$i+256){
    $eot=‘AAAA’ x $i;
    call_sp();
}
exit;

sub call_sp(){
    $str="\"C:\\Program Files\\Skype\\Phone\\Skype.exe\" \"/uri:$eot\"";
}

Now, I don’t know much about Perl, Skype, or Windows… but I can tell you this little piece of code generates a series of strings containing a Windows path to the Skype.exe followed by a parameter starting with “/uri:” and ending with reaaaallly long strings of A’s:

"C:\Program Files\Skype\Phone\Skype.exe" "/uri:AAAAAAAAAA...AAAAAAAAAA"

…starting with 256 copies of “AAAA”, incrementing by 256 until it reaches 0xCCCCC (that’s 838,860). The problem is, the code doesn’t do anything with the strings, it simply assigns them to a variable and continues on with the next iteration.

Edit: actually, the condition in the for loop, “$i>xCCCCC;”, effectively always evaluates to true, thus the loop will repeat infinitely. The “correct” condition would have been “$i<0xCCCCC;". Yet another sign this thing is fake?

If it were actually complete, it would be a really simple command line argument [fuzzer](http://en.wikipedia.org/wiki/Fuzz_testing): basically executing Skype.exe with varying length “uri:” arguments. And if, in fact, this type of thing could take down the entire Skype network, well, Skype definitely needs to put more effort into the security and robustness of their program, rather than trying to prevent reverse engineering of their protocol.

Perhaps leaving the tool incomplete was a deliberate attempt by the writer to demonstrate the vulnerability exists without quite providing a working tool, or perhaps the exploit is a hoax. I don’t know Russian, so I can’t tell if there’s more information on securitylab.ru.

It will be interesting to see what the real reason for the outage is. Of course, with the Skype protocol so locked down, we may never know what the real reason is…

Update: [according to Skype](http://heartbeat.skype.com/2007/08/what_happened_on_august_16.html), the outage was caused by the massive number of Windows machines rebooting and reconnecting to Skype after a Microsoft update, and a flaw in Skype’s “self-healing” ability. Microsoft effectively DDoS’d Skype…

DEF CON 0x0F

I had a great weekend in Las Vegas at [DEF CON 15](http://www.defcon.org/). Met lots of cool people, saw lots of interesting presentations, ate lots of good food, and spent way too much money doing it all.

Perhaps my favorite moment of the conference was when DEF CON organizer [Jeff Moss](http://en.wikipedia.org/wiki/Jeff_Moss_%28hacker%29) lured Michelle Madigan, the undercover NBC Dateline reporter, to a room full of thousands of DEF CON attendees, and well… watch for yourself…

Some of the more interesting talks I saw:

### Day 1 ###

– The Church of WiFi’s “Wireless Extravaganza”, an overview of their current WiFi and Bluetooth projects.
– Steve Dunker on police procedure.
– H.D. Moore’s “Tactical Exploitation” (also the talk in which the Dateline reported was outed).
– Jeff Moss on “CiscoGate”, the story of the Michael Lynn / Cisco / ISS / Black Hat debacle in 2006.
– David Hulton’s “Faster PwninG Assured”, using FPGA’s to crack Bluetooth PINs and WinZip / Apple DMG encryption.
– Johnnie Long on “No-Tech Hacking”.

### Day 2 ###

– Dan Kaminsky’s “Black Ops 2007”, various web vulnerabilities.
– Zac Francken’s talk hacking access control readers like HID Prox cards.
– Brett Neilson on modern radio scanning (which is inspiring me to get back into scanning).
– David Gustin overview of “hardware hacking for software geeks”.

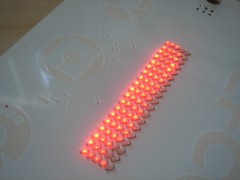
[Joe Grand](http://www.grandideastudio.com/) one-upped himself with the DEF CON badges this year. Last year the badge was a PCB with two blinking LEDs. This year it has 95 LEDs that can display scrolling text or a P.O.V., and can be reprogrammed by the user using the two capacitive touch sensing buttons.

DSC01606.JPG

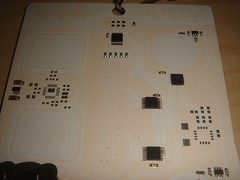
The PCB also has pads and traces for accelerometer and ZigBee wireless transceiver chips. It would have been awesome if everyone’s badge already had them… imagine 6,000 DEF CON attendees’ badges wirelessly transmitting their accelerometer data. With a bunch of receivers placed around the conference hall, you could make some pretty neat maps. Oh well, there’s always next year!

DSC01602.JPG
DSC01607.JPG

Security concerns in "web installer" and XBMC's web server

There have been some questions as to the security implications of the “web installer” available for installing the [XBMC iPhone Remote](http://tlrobinson.net/projects/xbmciphone/) and other XBMC applications. This page explains how it works and the problems with XBMC’s web server [HTTP-API](http://www.xboxmediacenter.com/wiki/index.php?title=web serverHTTP-API) which make this installer possible, as well as the solution to securing your XBMC web server.

Please note that simply installing XBMC iPhone Remote using EITHER the manual installation or web installation does NOT make your Xbox any less secure. It’s just HTML, CSS, and JavaScript, which are all harmless. There’s no server side ASP or Python code at all, other than in the web installer. Enabling XBMC’s web server in the first place (without password protection) is the problem.

Luckily there is an easy (although flawed) fix. See the “Solutions” section for instructions on how to enable password protection on the XBMC web server.

### Background ###

Any Xbox Media Center installation that has the web server enabled also has an HTTP interface that can be used to control various things on the Xbox, including pausing/playing, listing of files, etc, which are used extensively in the XBMC iPhone Remote and make it possible. It also allows you to control such things as downloading files, executing scripts, deleting files, etc, which are used in the “web installer”. Anyone who thinks about this for a moment will realize that this is rather unsafe, and could easily be used by malicious hackers to delete files, steal passwords, or gain complete control of your Xbox.

Normally this would not be a big problem because most users have their Xbox and computers on a LAN behind a home router (like Linksys, DLink, etc) so this interface isn’t available to the public Internet unless they specifically forward port 80 (HTTP) to their Xbox.

BUT, since for the web interface to be useful the user’s computer, iPhone, etc must have access to the Xbox’s web server. So the problem (or solution, in the case of the web installer) is that the user’s browser has unrestricted access to the web interface. When the user visits a webpage, that webpage could easily execute any command on the Xbox simply by loading an appropriate URL in a browser window or iframe.

Due to the [same origin policy](http://en.wikipedia.org/wiki/Same_origin_policy) in place on web browsers, the page that executes the command cannot access the results of the command, but that doesn’t matter since we can use the API to download and execute arbitrary PYthon scripts.

### How the web installer works ###

In fact this is exactly how the web installer works. It has to bootstrap itself by downloading a simple install script, then executes that script to do the actual installation. Credit goes to LiquidIce for the original web installer, I just modified it to be a little more automated and to suit the XBMC iPhone Remote.

The user enters their Xbox’s IP address into a text field on the project page, then presses the “Install” button:

– http://tlrobinson.net/projects/xbmciphone/index.php

The “Install” button executes a little JavaScript that creates a special URL with the user’s specified IP address, the “FileUpload” command, and the file to be uploaded which is a Python script that has been encoded into [Base64](http://en.wikipedia.org/wiki/Base64):

– http://tlrobinson.net/projects/xbmciphone/webinstaller.js (the JavaScript)
– http://tlrobinson.net/projects/xbmciphone/webinstaller-iphone.spy (the Python script before Base64 encoding)

The URL looks something like this (with 192.168.1.69 replaced with the actual Xbox IP, and ABCDEFG replaced with the actual long string of Base64 encoded Python, webinstaller-iphone.spy):
http://192.168.0.69/xbmcCmds/xbmcHttp?command=FileUpload(q:/web/webinstaller-iphone.spy;ABCDEFG)

The following commands can be used on Mac OS X (and others?) to encode and decode Base64, respectively:
– openssl enc -base64 -in webinstaller-iphone.spy > webinstaller-iphone-base64.txt
– openssl enc -base64 -d -in webinstaller-iphone-base64.txt > webinstaller-iphone.spy

The URL is then loaded into the iframe, which uploads the script to Q:/web/webinstaller-iphone.spy on the Xbox. After a short delay to ensure it had time to upload, the JavaScript then executes the just uploaded Python file by loading a URL similar to the one below in same iframe:

– http://192.168.0.69/webinstaller-iphone.spy

That executes the Python code that downloads the actual XBMC iPhone Remote files to the correct directory, cleans up, and finally redirects the page to http://192.168.0.69/iphone/ to display it.

– http://tlrobinson.net/projects/xbmciphone/iphone.rar (the rar file containing XBMC iPhone Remote)

So there it is. It’s nothing too sneaky. Feel free to look at all the files for yourself, decode the Base64 Python code, etc.

### The Problem ###

While this web installer is harmless, it would be trivial to write something more destructive to delete files, steal stored passwords for SMB, FTP, etc.

For the web installer, we simply ask the user for their Xbox’s IP address since we assume the user trusts us, but it wouldn’t be hard to brute force try all the common home LAN IP addresses (commonly 192.168.x.x). Also, while the web installer requires users interaction to initiate the installation, there’s no reason a malicious script couldn’t execute automatically.

Fortunately, XBMC provides password protection for the web server. Unfortunately, it’s not enable by default, and most people don’t bother to enable it.

### The (Partial) Solution ###

The solution is simple: enable password protection on the XBMC web server. In the Network settings menu, under Servers, there’s an option for a password.

There is one major problem with this: once you log into web server, the browser remembers that you have logged in for the remainder of the time it is open. This is convenient, as it would be very annoying to have to enter your username and password every time you issue a command to the, but could potentially be taken advantage of if you happen to log in prior to visiting a malicious page.

To test this (with the harmless web install example), enable password protection, then log into your Xbox’s web interface by visiting http://xbox/ where “xbox” is replaced with the actual Xbox IP address. Then use the [web installer](http://tlrobinson.net/projects/xbmc/) to perform the installation. It won’t ask for your password.

Additionally, you can change the web server port or use an obscure IP address for your Xbox. Although this only amounts to security through obscurity, it would likely be enough, bar some really determined hacker with something like [Jitko](http://ha.ckers.org/blog/20070402/jikto-leaked/).

### Conclusion ###

While it’s pretty unlikely that anyone cares enough about your Xbox to hack it, it’s a definite possibility, and would be nearly trivial with all the dangerous (yet useful) commands the HTTP-API gives us. In addition to being a neat and easy way to install a cool app on your Xbox, the web installer serves as a harmless proof of concept.

Thanks to LiquidIce for providing the original web installer code and idea.